Navigation Menu
Updating the Menu
If your theme supports custom menus, you can make modifications to them from the Menus option. Menus can contain links to Pages, Posts, Categories, Custom Links or other content types.
Adding a New Menu
Depending on the current Theme being used, your site may make use of more than one navigation menu. Sometimes you might have multiple menus in your site header, other times you may even have menus located in the sidebar or footer of your site.
To add a new menu, hover your cursor over the Appearance menu option in the left-hand navigation menu and in the fly-out menu, click the Menus link. Alternatively, click the Appearance menu option and then click the Menus link underneath.
On the screen that’s displayed, click the create a new menu link. You’ll be presented with a screen similar to below. Enter a name for your new menu in the Menu Name input field. Click the Create Menu button to create your new menu.

Editing an Existing Menu Item
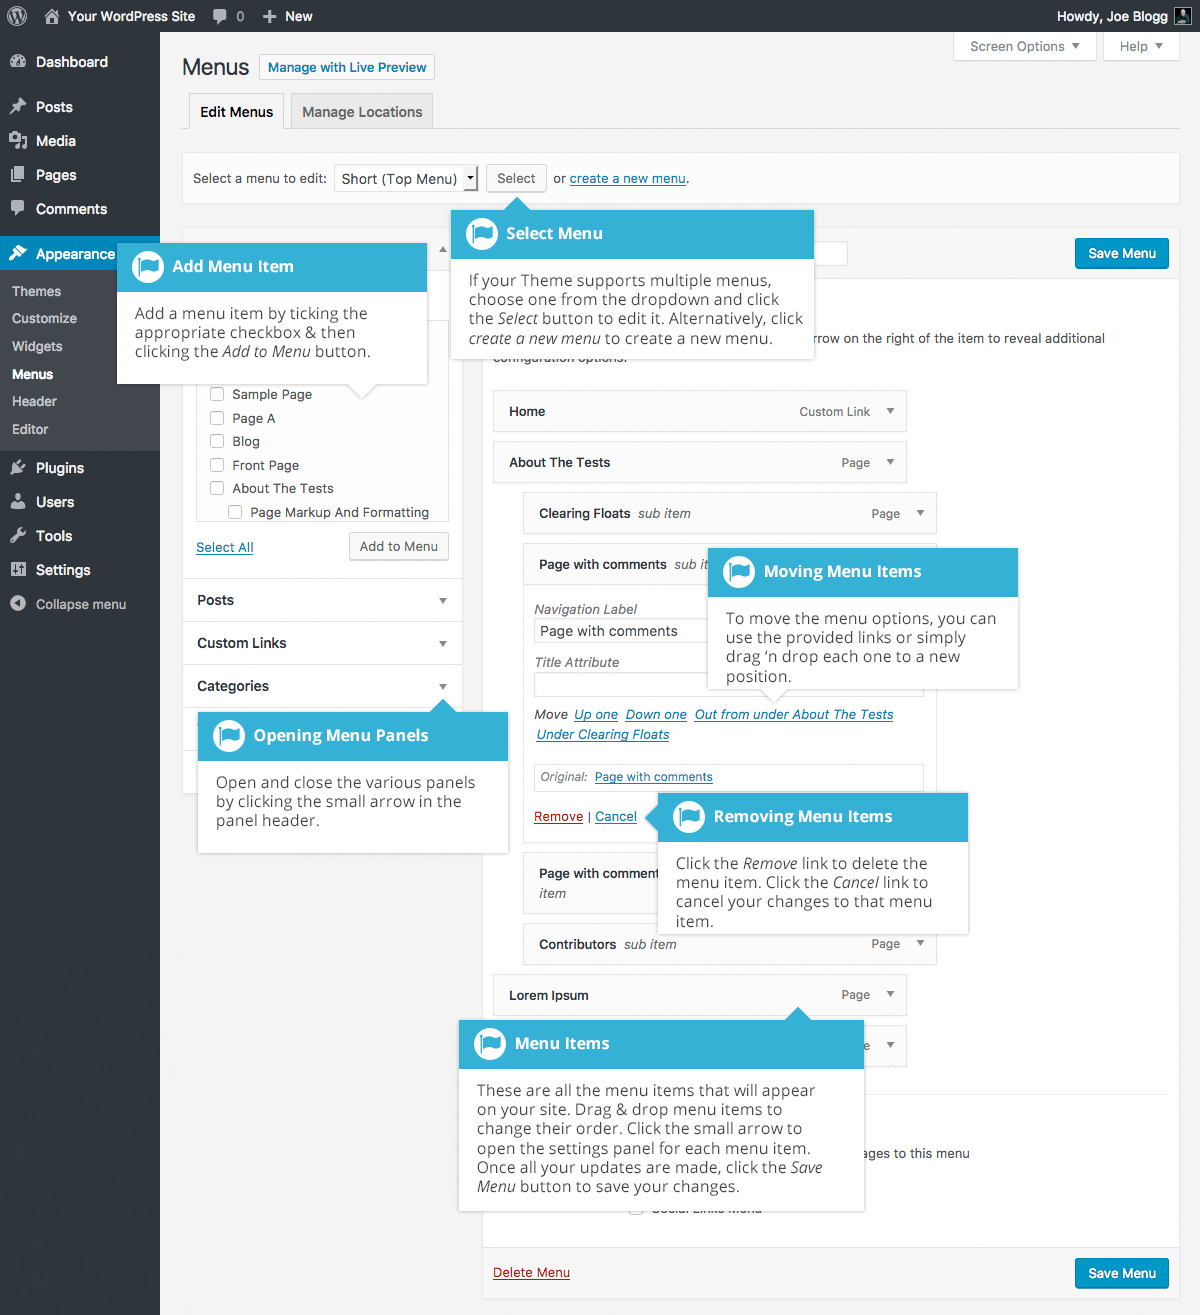
Your current list of menu items resides in the right-hand column on the menu screen. If there are multiple menus on your site, there will be a dropdown list displayed at the top of the page that enables you to select the menu that you would like to edit. Simply select the menu you would like to edit from the Select a menu to edit dropdown list and then click the Select button. The menu items for your selected menu will then be displayed.
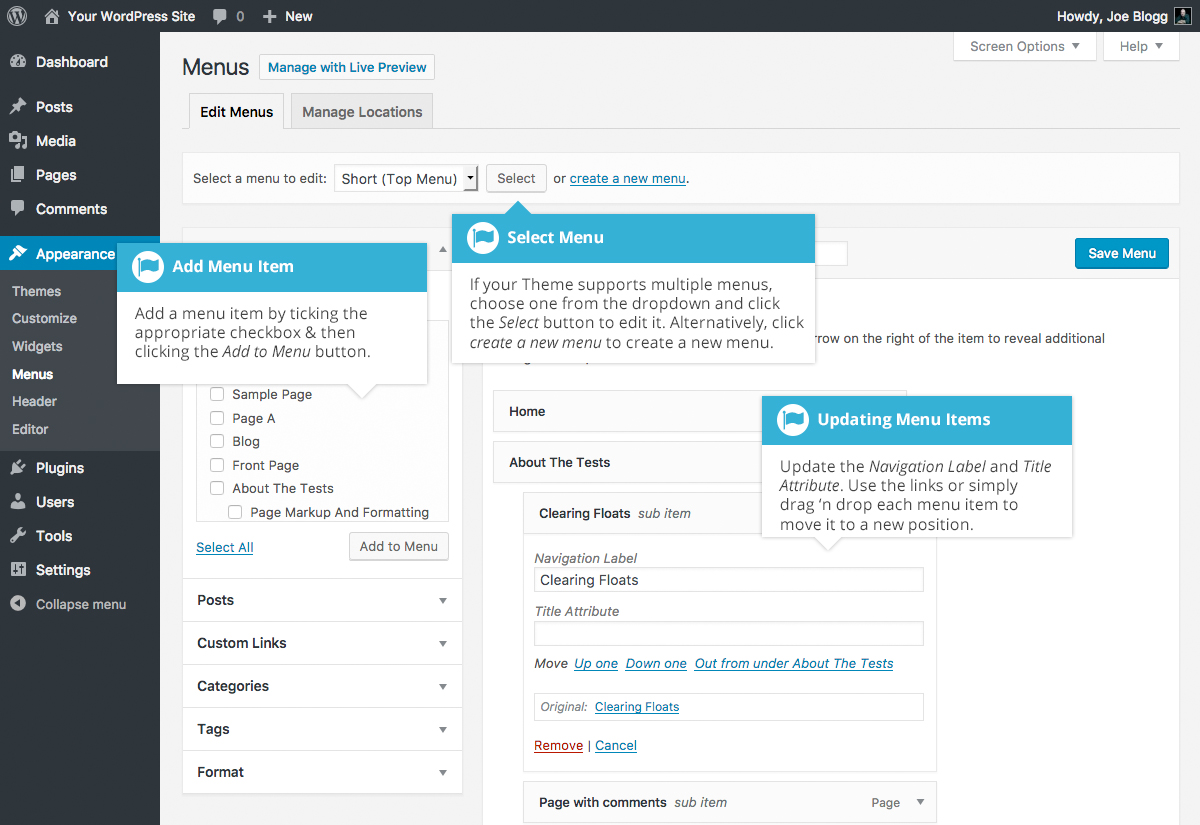
The items in this right-hand column on the Menus page will match the menu items that appear on your website. Clicking on the down arrow next to each menu item name will show an options panel for that particular menu item. In this options panel, there are several items that can be updated. You can show or hide extra fields such as Link Target, CSS Classes, Link Relationship (XFN) or Description using the Screen Options tab at the very top-right of the screen.
- URL – Only displayed for Custom Links and will contain the URL to navigate to when that menu item is clicked
- Navigation Label – This is the label that will display within the actual menu on your website
- Title Attribute – This is the tooltip that appears when the mouse cursor hovers over the menu item
- Open link in a new window/tab – (Hidden by default) You can set the menu item to open in the same window or tab (which is the default) or in a new window or tab. This option is made visible by ticking the Link Target option on the Screen Options panel
- CSS Classes – (Hidden by default) Optional CSS Classes to add to this menu item. This option is made visible by ticking the CSS Classes option on the Screen Options panel
- Link Relationship (XFN) – (Hidden by default) Allows for the generation of XFN attributes so you can show how you are related to the authors/owners of site to which you are linking. This option is made visible by ticking the Link Relationship (XFN) option on the Screen Options panel
- Description – (Hidden by default) The description for the link. This may or may not appear, depending on the theme. This option is made visible by ticking the Description option on the Screen Options panel
Each menu item can be moved to a new location in the menu hierarchy by using either the links underneath the Title Attribute input field or by clicking on the title area of the menu item and dragging ‘n dropping the menu to new location. If you choose to drag ‘n drop your menu items, the cursor will turn into a four-pointed arrow when you’re hovering over the correct area.
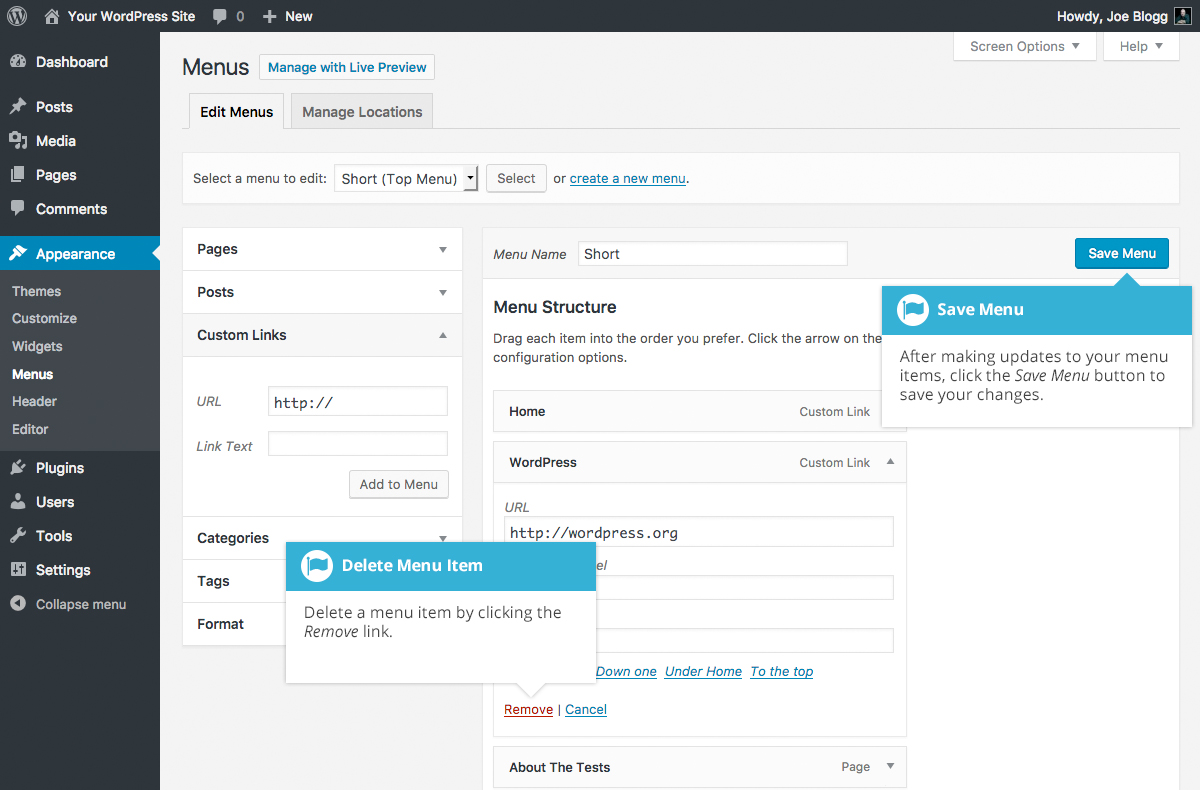
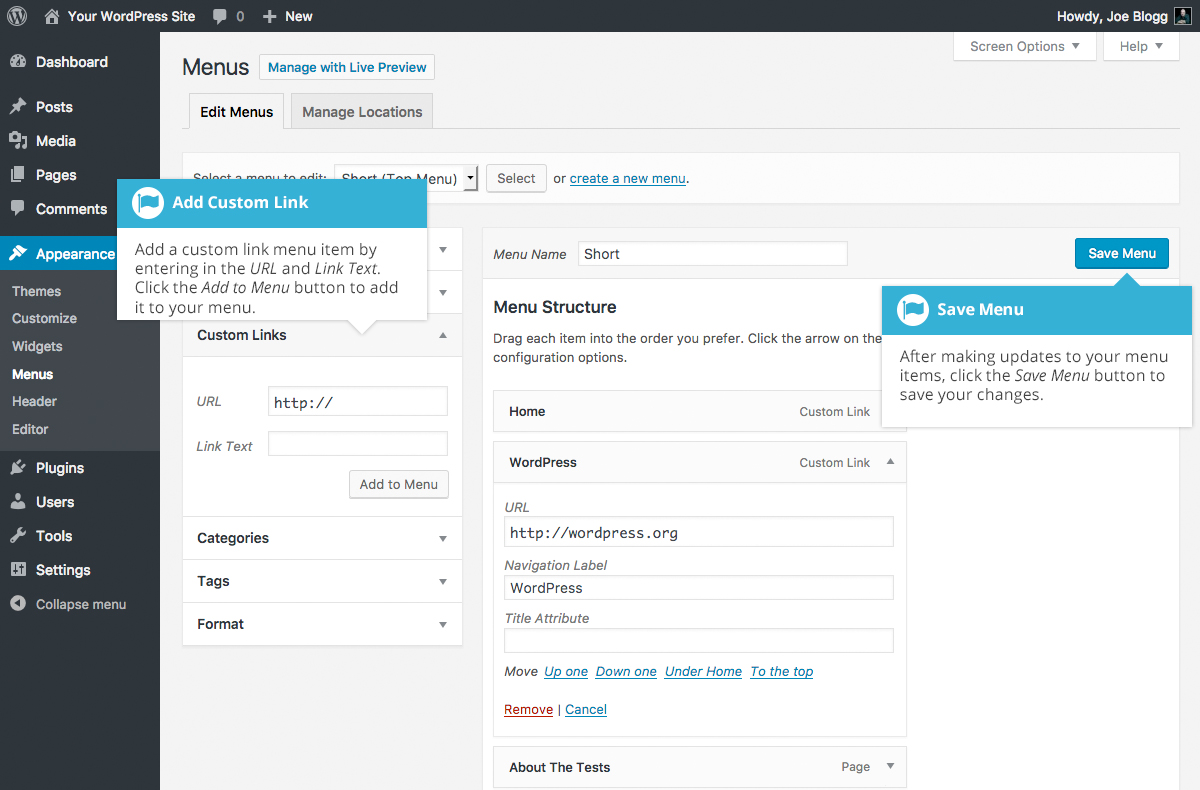
After making updates to your menu items, click the Save Menu button at the top or bottom of the screen.
Adding a New Menu Item
By default, only the Pages, Custom Links and Categories panels are shown. If you’d like to add Posts, Tags or Post Formats as menu items, you simply use the Screen Options tab at the top-right of the screen to enable these panels as well.
To add a new Page as a menu item, tick the checkboxes in the Pages panel, next to each of the Pages that you’d like to add. You can select one Page at a time or multiple. After selecting your Pages, click the Add to Menu button. The new menu items will append to the bottom of the current list of menu items. The menu item name will default to the Page name. To change this, simply click on the down arrow next to the menu item name to view the options panel and then update the Navigation Label to your preferred name. After making your updates, click the Save Menu button at the top or bottom of the screen. The steps to add a Post, Post Format, Category or Tag as a menu item are exactly the same as adding a Page.

To change the order that the menu options appear in, simply place your cursor over the title area of the menu item you’d like to move. When the cursor changes to a four-pointed arrow, click and drag the menu item to its new location. Depending on how your menu is configured within your theme, it’s even possible to create the multi-level hierarchy required for dropdown menus. After moving your menu items around, don’t forget to click the Save Menu button at the top or bottom of the screen to save your changes.
Adding a Custom Link menu item
Use the Custom Links panel to add a custom link to your menu, such as a link to an external website. Simply type in the website URL in the URL field and the menu name in the Link Text field. Click the Add to Menu button when done. Use the same steps outlined previously to adjust the order of the menu item and click the Save Menu button at the top or bottom of the screen to save your changes.
Deleting a Menu Item
To delete a menu item click on the down arrow next to the menu item name to view the options panel for that item and then click the Remove link. After making your updates, click the Save Menu button at the top or bottom of the screen.